Just sitting here, checking my email, and I came across a Laura Bassen video for the Papertrey Ink Blog. The challenge this week is coloring embossing paste, and I couldn't resist! I love embossing paste, and I rarely color it, so I had some fun.
I began with some white cardstock, and a 6x6 Stencil Girl stencil I recently acquired.
I used Wendy Vecchi's White Embossing Paste, and colored it with some Ranger Adirondack Re-inkers. First up, Wild Plum ... beautiful, vibrant color!
I schmeared it on with a palette knife on a few areas. I had alot left, so I quickly taped down another stencil on more cardstock and repeated.
Stream was next ... gorgeous!
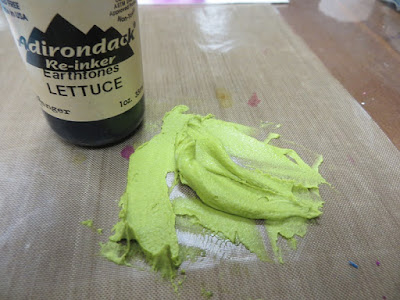
And, finally, Lettuce!
When using embossing paste, you have to work fairly quickly so the paste doesn't dry on your tools. After applying all my colors of paste, I cleaned off my stencil & knives with warm water.
I've been following the My Sweet Petunia Blog & the Neat & Tangled Blog this week as they've been collaborating using the Misti tool. I needed to stamp with black ink, as well as Versamark ink, and the Misti tool makes it soooo easy!
I put some tape over the word "HEART" at the bottom of the stamp and applied my Ranger Jet Black Archival Ink.
I removed the tape, and closed the door, and stamped onto my scrap of Vellum.
After cleaning off the stamp, I repeated the process by taping over the other words, only exposing the word "HEART", and inked that with Versamark. Added some Ranger Detail Gold embossing powder and heated to melt.
I added some watered down gold paint and black paint splatters, and some gold around my saying. I also added some Antique Linen Distress Ink around the heart after cutting it out, and also on the edges of my Old Olive Stampin' Up! cardstock base.
Here's a look at the finished card
I colored enough paste to make a 2nd card ...
I like this one even better!
I used another 6x6 Stencil Girl stencil
Added the 3 colors
And, voila!
I decided to try this stitched edge on all my edges
And then trimmed evenly around
I used some Ranger Detail Gold embossing powder again for the HELLO on vellum, and then Stampin' Up! White Detail embossing powder on black cardstock for the friend. I popped up the panel, then popped up the vellum. I attached with black banner with Tim's Tiny Attacher. I finished it off with a little spritz from a black marker.
I'm able to enter these cards into several challenges:
Simon Says Stamp Wednesday Challenge: Have a Heart
A Blog Named Hero: A Bit of Sparkle
Simon Says Stamp Work it Wednesday: Something New
CropStop Challenge: Anything Goes
Creative Carte Blanche: Never Done Before
Wish me luck!


U don't need luck U r amazing!
ReplyDeleteAwwww! Thx mamasita!
DeleteStephanie, what a cool project! This would make an amazing fabric (have you checked out Spoonflower? They can print any design into fabric yardage). Thanks for sharing it at Creative Carte Blanche!
ReplyDeleteWhat great cards with such vibrant color and dimension. I loved that you tried something you've never done before and shared it on the Creative Carte Blanche blog. Awesome!
ReplyDeleteThese are so great. You are having WAY too much fun! Thanks for letting us share in your Creative Carte Blanche fun!!
ReplyDeleteLove both of these Stephanie but there is something quite mesmerizing about the second one!
ReplyDeleteThanks Seth! I really like the 2nd one better myself. I love that the paste has an uneven texture. It was the 1st time using both of these stencils. Gotta try this technique with one of yours!
DeleteStephanie...this is awesome! I love the colored embossing paste! Thanks so much for the great photos. I adore those bright colors against the white background. That makes them POP even more. What adorable cards! Thanks so much for sharing with us at Creative Carte Blanche! Keep the creativity flowing!
ReplyDeletecool! Thanks for the tutorial!
ReplyDeleteHi Stephanie...what a really cool project! Great tutorial as well...I love the bright cheery fun colors you used...Thanks so much for sharing your creativity with us at Creative Carte Blanche!
ReplyDeleteHow fabulous and what a great idea for adding colour to your art... thanks for joining us at Creative Carte Blanche
ReplyDeleteLove these! Great job with the color mixing :) And thanks for joining our challenge, good luck!!
ReplyDelete