Thursday, February 25, 2016

A Wendy Vecchi Technique


I was checking out Wendy Vecchi's blog tonight, and I clicked on the link that brought me to a Melody Lane video of Miss Wendy demonstrating at the winter CHA 2016.  Wendy demo'd the use of Ranger's Archival Inks over Ranger's Weathered White embossing powder.  I encourage you to watch the video.  First off, the Ranger Glacier White pigment ink pad she used to stamp with was awesome on the black mat board!  So crisp & vibrant!  She had me so excited, I just had to play!

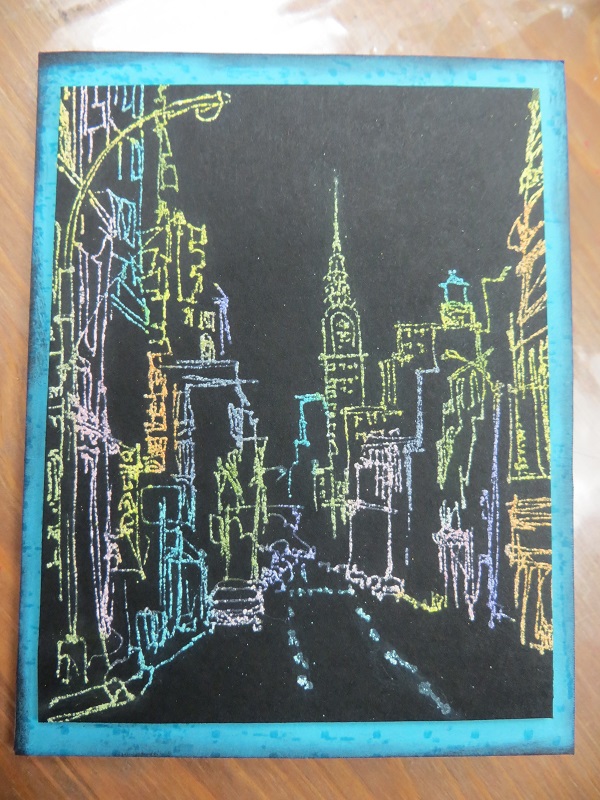
I took some black cardstock, and inked up one of my newest acquisitions, Watercolor NY by Technique Junkie.  I used the Glacier White ink, and then covered with Weathered White embossing powder and melted.  Since I had such tiny places to ink, I used some pointed manicure swabs I got from Harmon.  It's not as easy to pick up ink from the pad with these as it is the ink blending tool.  I could've put drops of reinkers on my craft sheet, but instead of wasting all that ink, I decided to just reink all my Archival pads until they were nice & juicy.

After coloring, I heat set the panel & trimmed.  I wanted the colors to pop, so I used some Tempting Turquoise cardstock from Stampin' Up! as a base.  Kind of plain, so I used Versamark on a background stamp for some texture, and then ran some Black Soot Distress Ink around the edges.

I was just looking as my picture as I was writing this, and I thought I needed some bling ...


Now, what do you think?  I think me likes.  :-)

I'm going to submit this for several challenges:

Happy Little Stampers:  February Mixed Media Challenge  (oops!  posted here, but I just noticed this challenge is PAINT ... my bad!)

Wow!  That's the most challenges I've met with just one card!  Yeah!


Saturday, February 6, 2016

Colored Embossing Paste


Just sitting here, checking my email, and I came across a Laura Bassen video for the Papertrey Ink Blog.  The challenge this week is coloring embossing paste, and I couldn't resist!  I love embossing paste, and I rarely color it, so I had some fun.


I began with some white cardstock, and a 6x6 Stencil Girl stencil I recently acquired.


I used Wendy Vecchi's White Embossing Paste, and colored it with some Ranger Adirondack Re-inkers.  First up, Wild Plum ... beautiful, vibrant color!


I schmeared it on with a palette knife on a few areas.  I had alot left, so I quickly taped down another stencil on more cardstock and repeated.


Stream was next ... gorgeous!


And, finally, Lettuce!


When using embossing paste, you have to work fairly quickly so the paste doesn't dry on your tools.  After applying all my colors of paste, I cleaned off my stencil & knives with warm water.


I've been following the My Sweet Petunia Blog & the Neat & Tangled Blog this week as they've been collaborating using the Misti tool.  I needed to stamp with black ink, as well as Versamark ink, and the Misti tool makes it soooo easy!

I put some tape over the word "HEART" at the bottom of the stamp and applied my Ranger Jet Black Archival Ink.  


I removed the tape, and closed the door, and stamped onto my scrap of Vellum.

After cleaning off the stamp, I repeated the process by taping over the other words, only exposing the word "HEART", and inked that with Versamark.  Added some Ranger Detail Gold embossing powder and heated to melt.

I added some watered down gold paint and black paint splatters, and some gold around my saying.  I also added some Antique Linen Distress Ink around the heart after cutting it out, and also on the edges of my Old Olive Stampin' Up! cardstock base.

Here's a look at the finished card


I colored enough paste to make a 2nd card ... 


I like this one even better!  


I used another 6x6 Stencil Girl stencil


Added the 3 colors


And, voila!


I decided to try this stitched edge on all my edges


And then trimmed evenly around


I used some Ranger Detail Gold embossing powder again for the HELLO on vellum, and then Stampin' Up! White Detail embossing powder on black cardstock for the friend.  I popped up the panel, then popped up the vellum.  I attached with black banner with Tim's Tiny Attacher.  I finished it off with a little spritz from a black marker.

I'm able to enter these cards into several challenges:
A Blog Named Hero:  A Bit of Sparkle
CropStop Challenge:  Anything Goes
Creative Carte Blanche:  Never Done Before


Wish me luck!